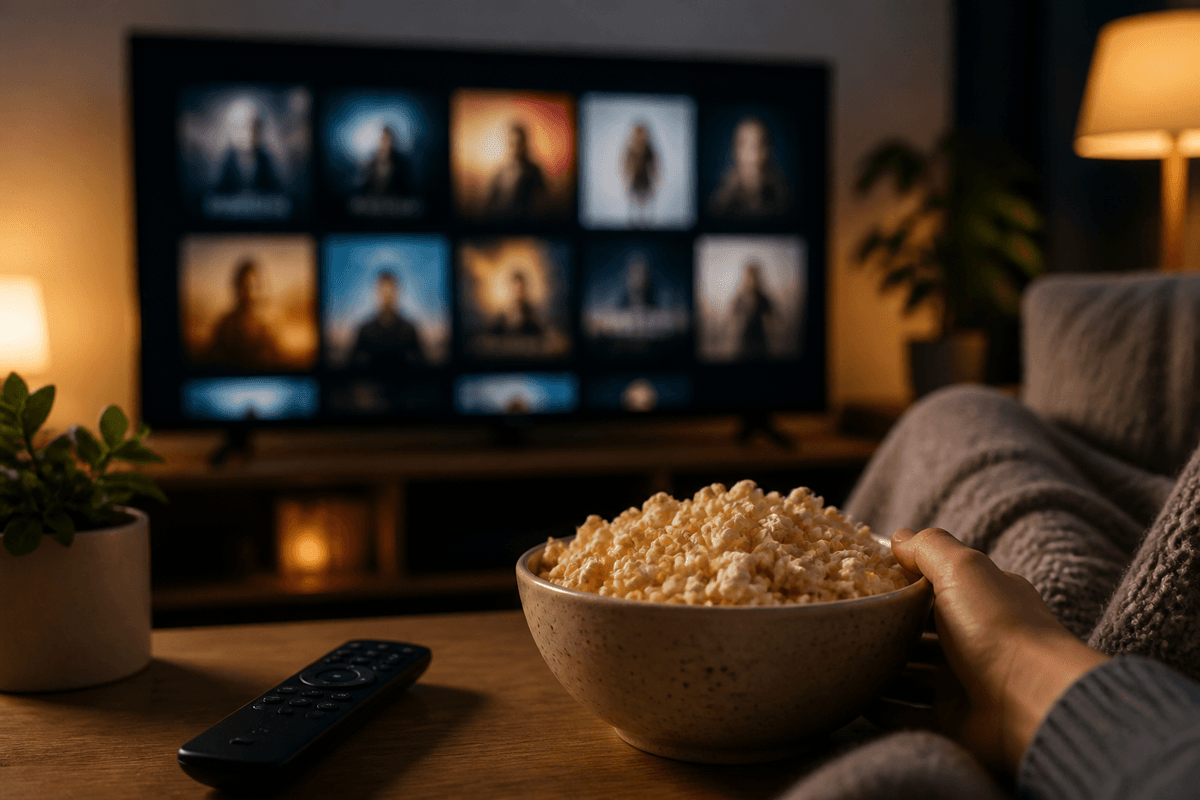
What I wanted from mood lighting (and what I didn’t)
I wanted lighting that could shift the room’s vibe without turning my wall into a science project. The goal was soft, even color that reads on camera and in-person, with quick access to a few “default” looks—focus, chill, and late-night gaming—without constantly fiddling in the app. I also wanted it to feel intentional when the panels were off, not like random gadgets stuck to drywall.
What I didn’t want was “wow” brightness that ruins monitor contrast, nonstop animations that distract, or a setup that depends on perfect Wi‑Fi to function. I wasn’t trying to replace my main lights, and I didn’t want visible cables or a controller dangling mid-wall. I accepted one real trade-off up front: to keep it clean, I’d limit panel count and place everything where power was already convenient.
Picking a wall spot that looks good day and night
The easiest way to make Nanoleaf panels feel “built-in” is to pick a wall that already reads as a backdrop: behind your desk, above a couch, or the empty zone between a door and a window. I avoid the wall that’s constantly in motion (closet doors, chairs scraping, traffic paths), because bumping panels is how adhesives get tested. If you’re on camera, place them where they’ll sit in your frame without turning into a halo directly behind your head.
Then I check the wall in daylight with the panels off. If the surface has strong texture, flaky paint, or that semi-gloss shine that shows every edge, I either move spots or plan for extra prep. I also look for “cable gravity”: can the power lead drop straight down into a desk, media console, or cable raceway without crossing a window trim or floating in open space? The cleanest layout usually starts with the nearest outlet, not the prettiest empty patch of wall.
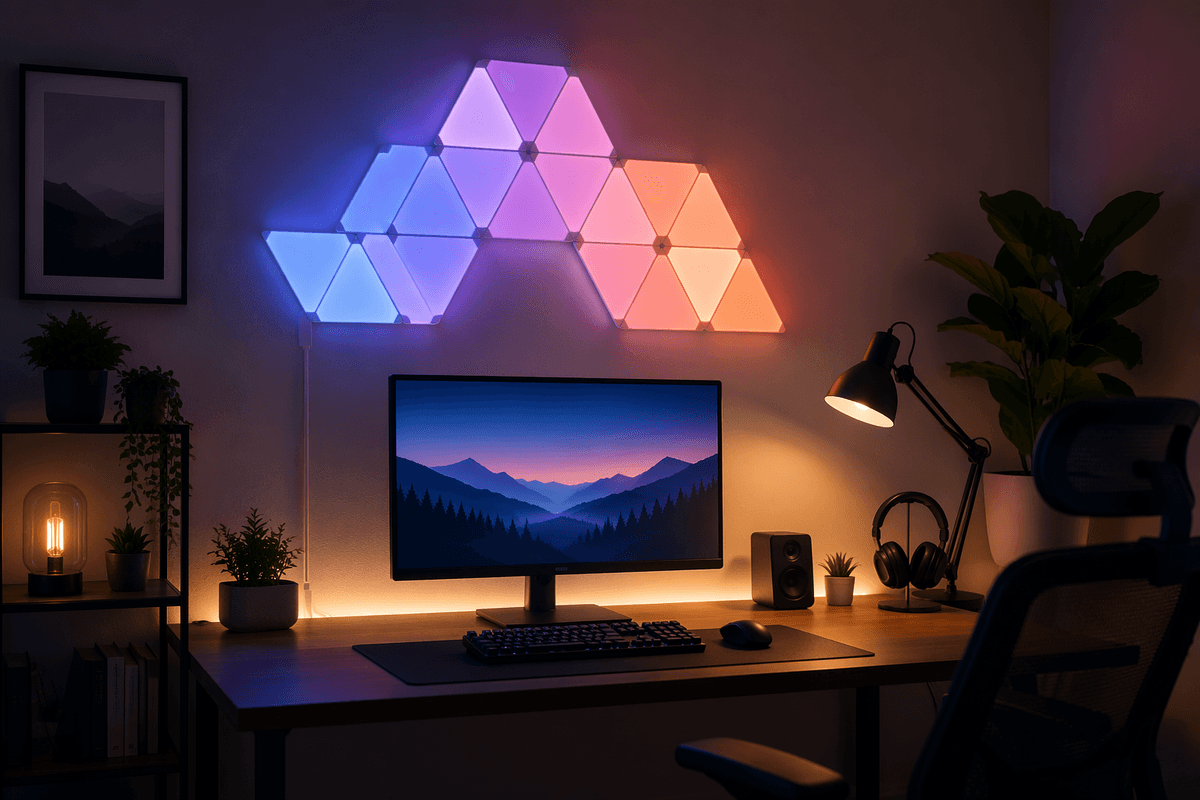
Designing the layout: symmetry, flow, and panel count
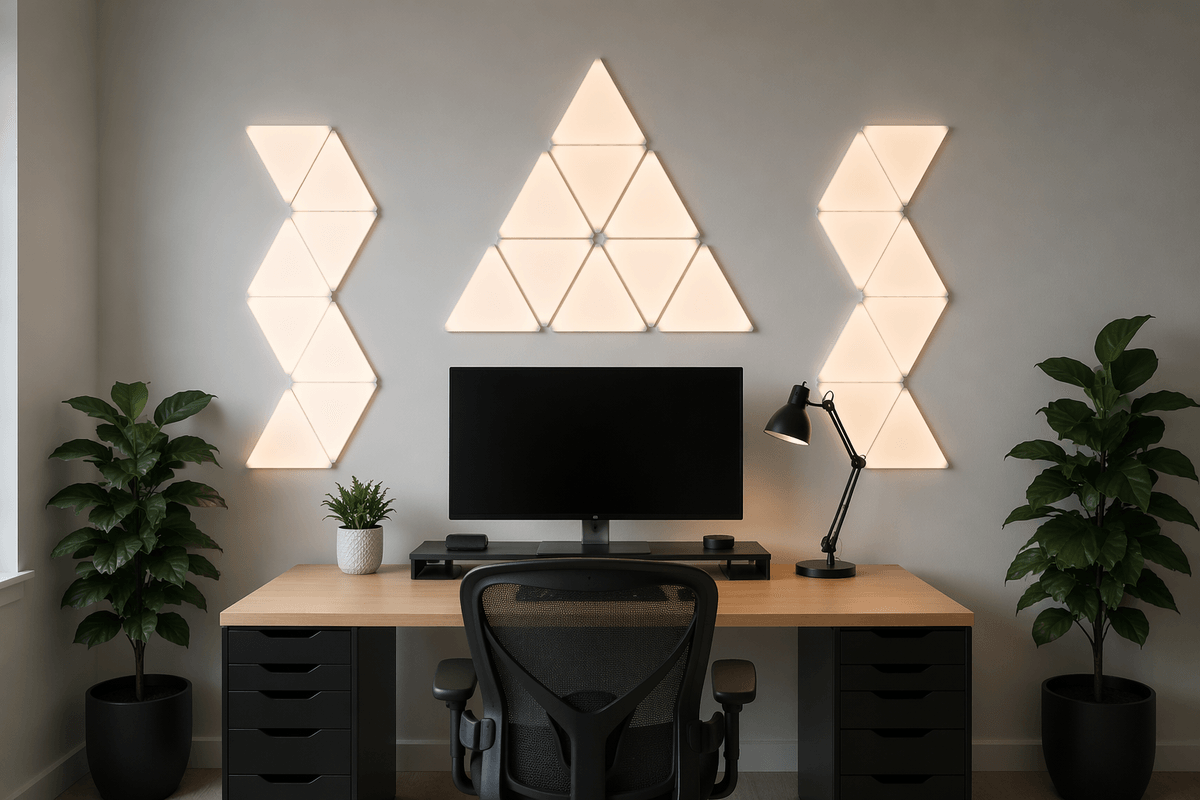
The layout decision that matters most is whether you want it to feel “graphic” or “ambient.” Graphic means clean symmetry: a triangle, a centered cluster, a mirrored shape over your desk. Ambient means flow: a shape that leans toward your monitor, wraps a corner, or extends in one direction like it’s following the room. I usually sketch both with painter’s tape first, then step back to the doorway and also sit in my chair—those two viewpoints catch 90% of the “why does this feel off?” problems.
Panel count is where people overbuy. More panels don’t automatically look better; they just make the shape harder to anchor and the animations busier. In a typical desk setup, a tight 7–9 panel cluster reads intentional and stays easy to center. If you’re going larger (12–15+), commit to a clear outline (diamond/arrow/hex-like block) so it doesn’t turn into a drifting blob.
I also plan around one practical constraint: where the controller and power will exit the shape. I pick a “bottom” panel on purpose so the cable drops straight into furniture or a raceway, and I keep at least a couple inches from trim and corners so the layout looks balanced even when the lights are off.
Mounting without regrets: clean lines, strong adhesion
The moment you regret a panel setup is usually day two, when one corner starts lifting or the whole shape is a degree off-level. I dry-fit the layout again, then put a tiny pencil mark at the top-most point so I’m not “correcting” as I go. Before any adhesive touches the wall, I wipe each spot with isopropyl alcohol and let it fully dry. On fresh paint, I wait longer than I want to—rushing this is how you pull paint later, even if the panels never fall.
I start from the panel I chose as the “bottom” (where the power will drop), press it firmly for 30–60 seconds, then build outward. Use a small level every couple panels; your eyes lie when you’re close to the wall. The connectors will guide spacing, but they won’t fix a skew that starts early.
If you’re renting or your wall texture is questionable, accept the trade-off: extra prep and gentler expectations. Command-style strips or Nanoleaf’s mounts can be safer on paint, but they add thickness and can make edges cast tiny shadows in daylight.
Power, cables, and controllers: hiding the messy parts
The clean look lives or dies by where the power supply lands. I plan a “fall line” from that bottom panel straight down into something that already hides clutter: the back of a desk, a bookcase side, a media console. If the outlet is off to the side, I’d rather shift the whole layout a few inches than run a cable diagonally across open wall. A slim paintable raceway is the easiest upgrade if you can’t avoid a visible drop, and it’s renter-friendly if you use removable strips.
Controllers are the other giveaway. I stick the controller on the back edge of the lowest panel or tuck it behind the desk with enough slack to avoid tugging when the wall flexes. Don’t coil extra cable tightly behind the panels; it can push on the adhesive and slowly peel edges. Also plan for a real constraint: you need access to the controller button at least once in a while for resets, so don’t bury it where you’ll hate your life later.
App setup and scenes that actually feel like moods
The app part is where most people accidentally end up with “demo mode” lighting. After pairing, I rename the device and each panel group in a way that matches how I’ll actually use it (“Desk Wall,” not “Shapes 1”). Then I immediately run any firmware update and set a steady default scene before I do anything fancy. This avoids the awkward moment where the lights reconnect to a random animation at full brightness after a restart.
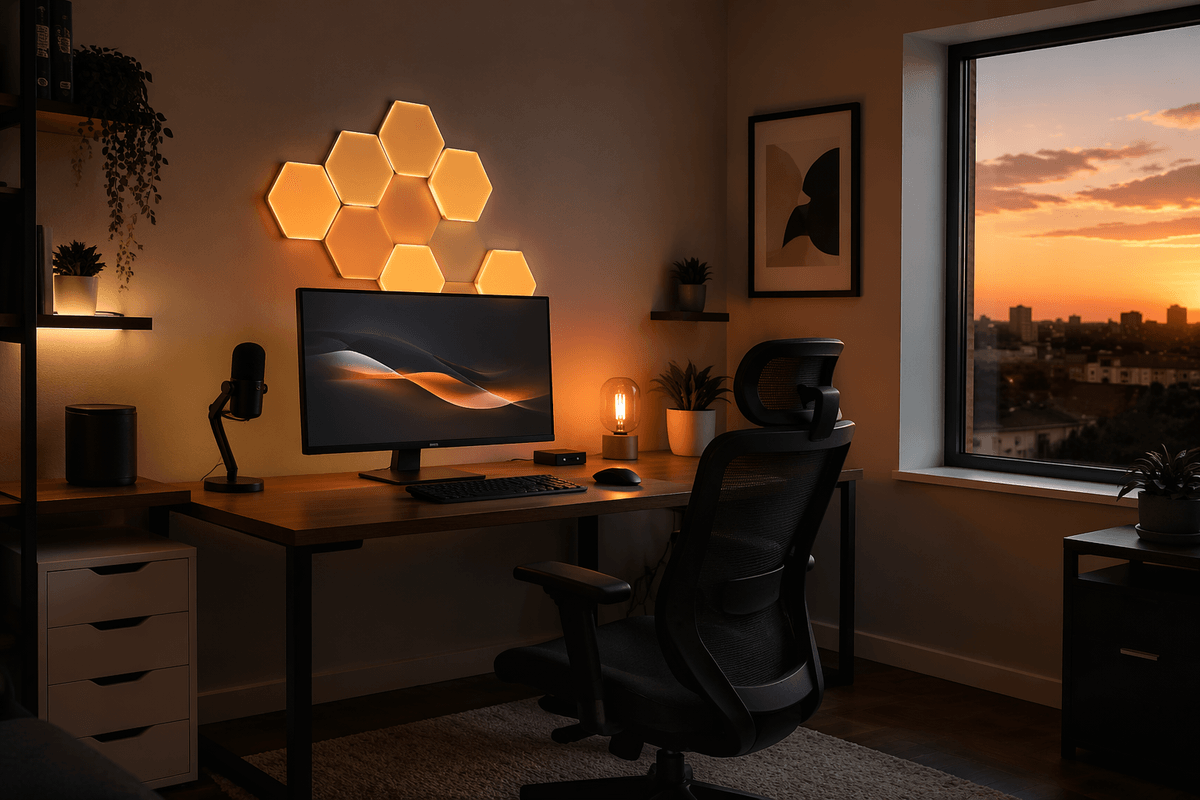
For scenes that read like moods, I keep motion subtle and colors limited. My “focus” scene is a cool white or pale blue with low saturation, around 15–30% brightness so it doesn’t fight the monitor. “Chill” is warm gradients (amber to soft pink) with slow transitions, not strobing. “Late-night gaming” is where I’ll allow more color, but I still cap brightness and avoid high-contrast flashing that pulls attention off the screen.
The practical constraint is reliability: if your Wi‑Fi hiccups, cloud-dependent control can lag. I set one scene as a power-on default and map the controller button to cycle my three staples, so I’m not stuck opening the app every time. If you share a space, also add a “dim warm” scene for when someone else just wants the room to calm down fast.
My daily-use tweaks: automations, controls, and maintenance
The first tweak that made the panels feel “daily-use” was getting them out of my phone. I added a simple schedule: a low-brightness warm scene about 30 minutes before sunset, and an automatic dim-down at a fixed time so I don’t accidentally end the night with the wall still blazing. If you’re on calls, a second automation helps more than you’d think: a “meeting” scene that’s neutral and steady, triggered by a calendar block or a manual widget, so your background doesn’t slowly morph mid-sentence.
For control, I keep three paths: controller button cycles my staples, a desktop widget/stream deck button for one-tap changes, and voice control only for the basics (“off” and “dim to 10%”). Anything more complicated tends to fail at the exact moment you want it. The practical cost is time: expect 20–30 minutes of fiddling to get automations behaving consistently across Wi‑Fi drops and power outages.
Maintenance is mostly adhesive and dust. Once a month I press along the edges to catch a lift early, and I dry-dust with a microfiber cloth so I’m not pushing grime into seams. If a panel starts drifting, I fix it immediately instead of “living with it,” because tiny misalignment looks worse every day the longer you stare at it.
A simple checklist to copy this setup in your space
Pick a backdrop wall you actually see (desk/couch), then stand in the doorway and sit in your chair to confirm it looks balanced with the panels off.
Choose panel count first (7–9 is easy to center), decide “graphic” (symmetry) or “ambient” (flow), and mark the top reference point plus the bottom “power exit” panel.
Prep matters: wipe with isopropyl alcohol, wait on fresh paint, mount from the bottom out, and level every couple panels. Plan a straight cable drop into furniture or a slim raceway; don’t coil cable behind panels, and keep the controller reachable.
In the app: rename, update firmware, set a calm power-on default, make three staple scenes (focus/chill/night), map the controller to cycle them, and add one sunset-on + bedtime-dim automation.